
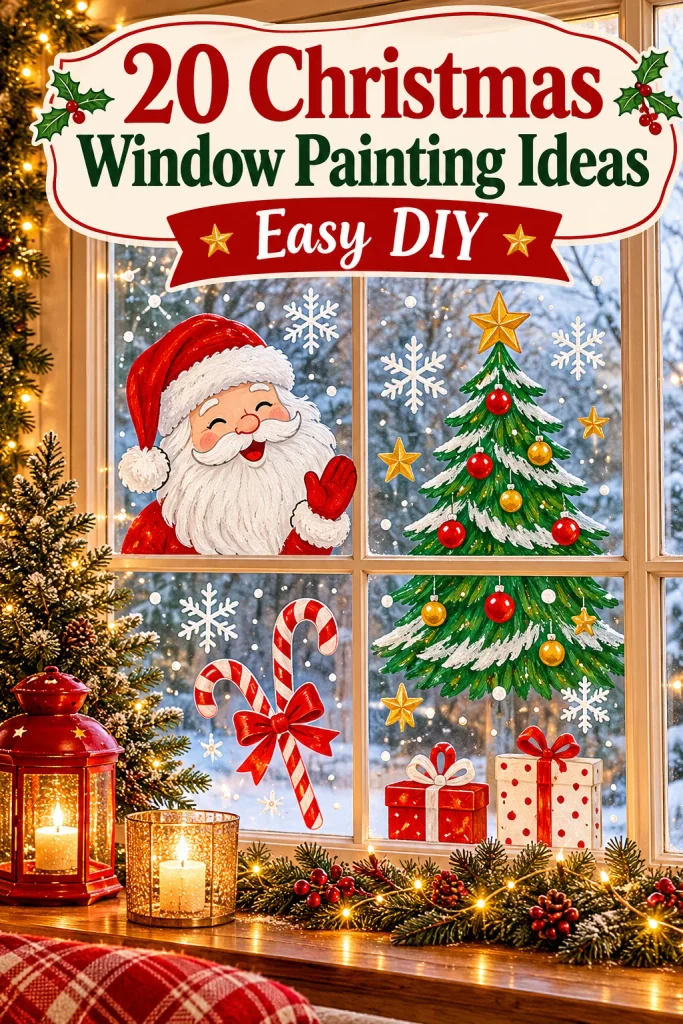
Christmas windows have a special kind of magic. When snowflakes, twinkling stars, and cheerful characters glow against the winter light, your home instantly feels warmer and more festive. The best part is that you don’t need to be an artist to create this look. With a few paint markers, a sponge, and some simple stencils, anyone can turn plain glass into a holiday masterpiece. These 20 Christmas window painting ideas are easy, affordable, and perfect for DIY beginners.
Whether you want a classic snowy scene, a playful Santa, or an elegant gold garland, there is a design here for every style and skill level. Each idea includes simple tips on materials, techniques, and layout, so you can start painting with confidence. Most projects take under an hour, wash off easily with glass cleaner, and look beautiful from both inside and outside, making them ideal for families, classrooms, shops, and festive neighborhood displays.
Before you begin, gather washable window paint or chalk markers, a soft brush, painter’s tape, and a damp cloth for quick fixes. Sketch your design lightly or use a printed template taped behind the glass for easy tracing. Save your favorite ideas as you scroll, share the fun with the kids, and get ready to fill your home with holiday cheer. Let’s dive into these creative and easy Christmas window painting ideas!
1. Classic Snowflake Border
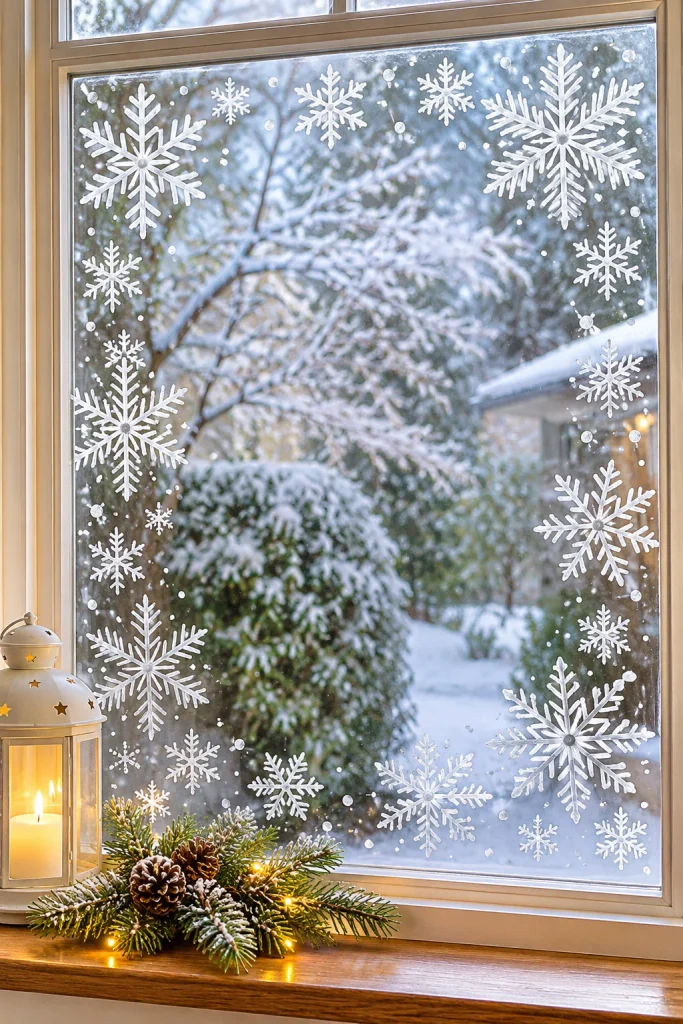
Snowflakes are the easiest way to give any window instant winter charm. Use a white paint marker to draw six-pointed designs in different sizes, then scatter them around the glass edges to form a delicate frame. Vary the patterns by adding tiny dots, lines, and diamonds to each arm. The result looks elegant, light, and airy, and it works beautifully on kitchen windows, bedroom panes, and glass doors throughout your home.
To keep the shapes symmetrical, trace a paper snowflake template or a cookie cutter lightly onto the glass first. Start from the center and work outward so your hand never smudges wet paint. Try mixing white with a touch of silver or icy blue for a shimmering effect. Because snowflakes are simple and forgiving, they are perfect for beginners, kids, and anyone who wants a quick holiday decoration without any stress.
2. Smiling Santa Face
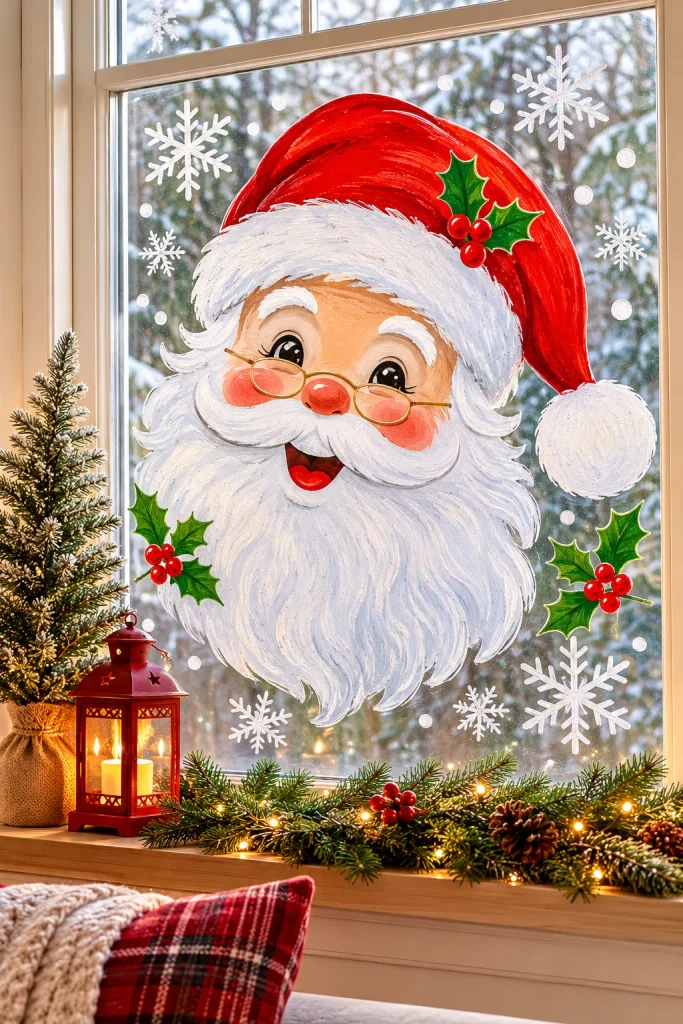
A cheerful Santa face is a holiday favorite that makes everyone smile. Start with a round peach circle for the face, then add a fluffy white beard, a bright red hat with a pom-pom, and rosy cheeks. Finish with black dots for eyes and a curved mustache. Painting him large on the center of your window turns your home into the friendliest spot on the street. Kids absolutely love helping with this one.
Use thick, opaque paint for the red hat so the color stays bold against the daylight. Let each layer dry for a few minutes before adding details, which prevents muddy blending. A sponge dabbed gently along the beard creates a soft, fluffy texture that looks wonderfully realistic. If you prefer an easier version, paint only the hat and beard, and let the glass act as the face for a clever, simple design.
3. Cute Snowman Family
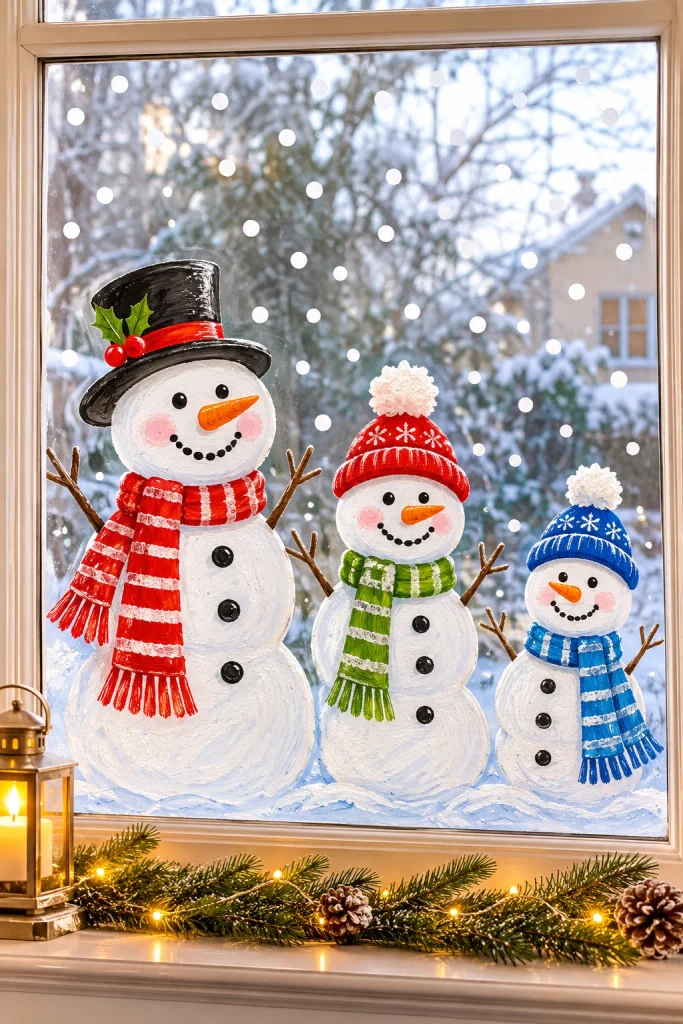
A snowman family brings playful personality to your window and tells a sweet story at the same time. Paint three round snowmen in graduating sizes, then give each a unique scarf, hat, and expression. Add carrot noses, coal buttons, and twig arms for classic charm. Place them along the bottom of the window as if they are standing on real snowy ground, and sprinkle white dots above for gently falling snow.
White paint can look transparent on glass, so apply two thin coats rather than one thick layer. Outline each snowman with a light gray or blue marker to make the shapes pop in daylight. Use bright reds, greens, and yellows for scarves to add festive color contrast. Let the children choose the faces and accessories, because slightly uneven, hand-drawn characters give the finished window a warm, personal, and unmistakably homemade holiday feeling.
4. Decorated Christmas Tree
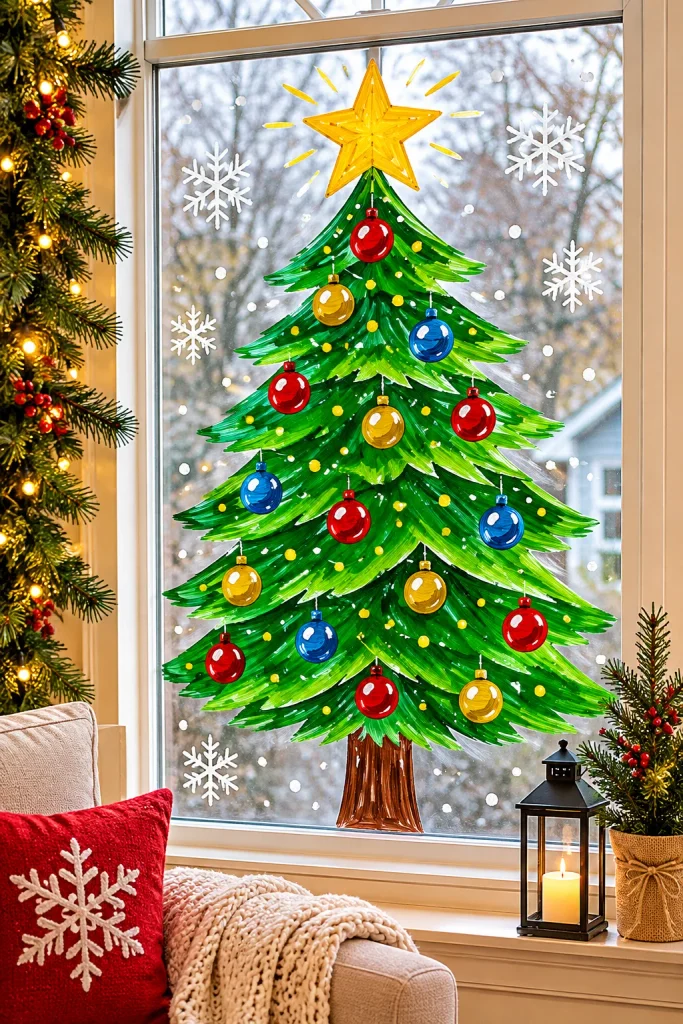
A painted Christmas tree is a timeless design that suits any window shape. Begin with a simple green triangle made of stacked zigzag layers, then add a brown trunk at the bottom. Dot colorful ornaments across the branches using red, gold, and blue paint. Top it with a bright yellow star, and your window instantly glows with the same joyful feeling as a real tree in the living room. It is quick and rewarding.
For a modern twist, outline the tree with a single continuous line in white or gold, leaving the inside open so the view outside shows through. Add small circles for baubles and tiny dots for twinkling lights. Painting several trees in different sizes creates a charming forest effect across wide windows. Keep your brush strokes loose and playful, since imperfect lines give the tree a handmade character that people absolutely love.
5. Rudolph the Red-Nosed Reindeer

Rudolph is a beloved character who brings storybook magic to any window. Paint a brown reindeer face with long antlers, big friendly eyes, and a glowing red nose that becomes the focal point. Add small ears and a tuft of lighter fur on the forehead for extra detail. Position him in a corner or peeking from the bottom edge so he seems to be watching the winter night curiously. Kids adore this one.
Make the red nose shine by layering a small dot of glossy red paint over a matte base and adding a tiny white highlight. Antlers look best when drawn with slightly curved branches rather than straight lines. If you want a glowing nighttime effect, place a battery-powered string light behind the nose. This design is quick, expressive, and perfect for families who want a recognizable character without needing advanced painting skills.
6. Starry Night Sky With Gold Stars
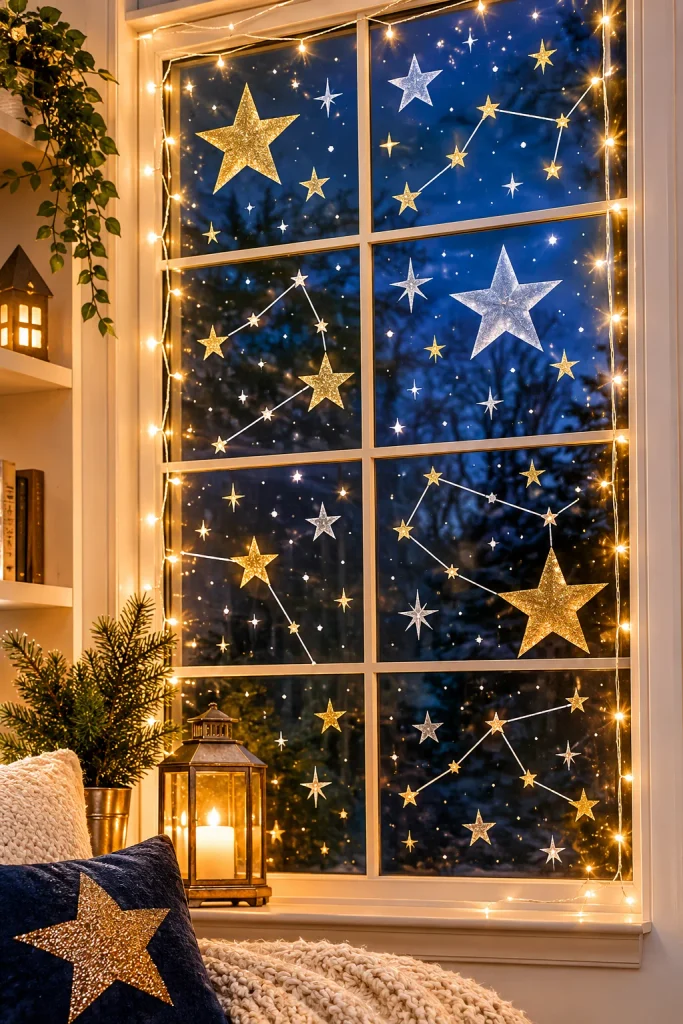
Stars are simple shapes that look stunning when scattered across glass. Paint stars in different sizes using gold, silver, and white paint, and vary the points between four and five for natural variety. Connect a few of them with thin lines to create constellation patterns. The effect is magical and modern, giving your window a calm, elegant glow that suits minimalist homes as well as traditional holiday decorating styles. It takes minutes.
Gold paint looks richest when applied in two thin coats, so let the first layer dry before adding another. Tiny dots and sparkles around each star create a twinkling feel without extra effort. For a beautiful gradient, cluster larger stars near the top and let them gradually shrink toward the bottom. Pair this design with warm white fairy lights in the evening, and your window will shimmer like a peaceful winter sky.
7. Gingerbread House Scene
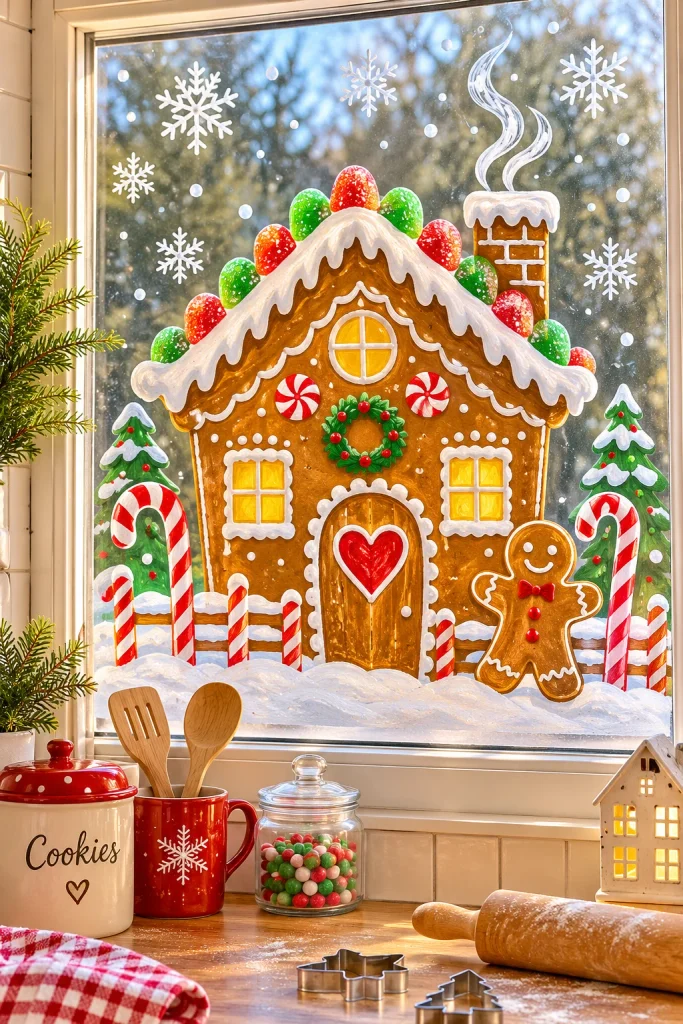
A painted gingerbread house feels sweet, nostalgic, and full of holiday spirit. Draw a simple house shape in warm brown, then decorate it with white icing lines along the roof and windows. Add colorful gumdrops, a candy cane fence, and a heart-shaped door for charm. Place a small gingerbread man beside the entrance, and the whole scene looks like it stepped straight out of a children’s storybook. Everyone will want a closer look.
Brown paint can appear dark on glass, so choose a warm caramel shade for a lighter, tastier look. Use a fine-tip marker for icing details, which keeps lines crisp and delicate. Dab small dots of pink, green, and yellow for candy decorations. If you enjoy baking, hang a real gingerbread cookie nearby for a sweet finishing touch. This idea is especially wonderful for kitchen windows, where it blends naturally with seasonal treats.
8. Candy Cane Stripes
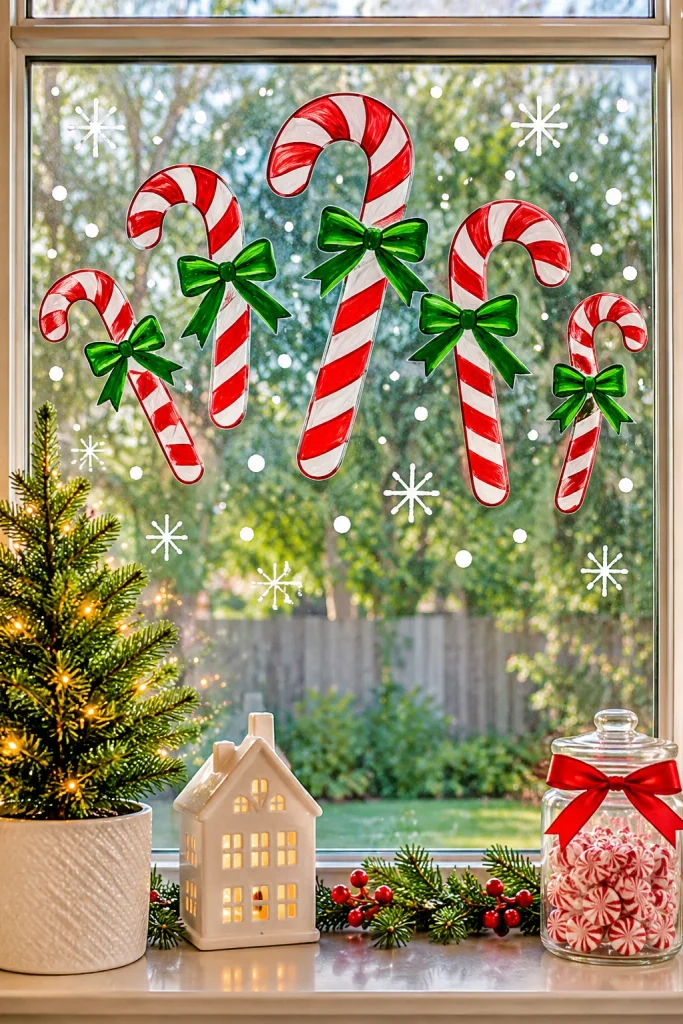
Candy canes are among the easiest Christmas shapes to paint, which makes them perfect for beginners. Draw a long curved hook with white paint, then add diagonal red stripes at even intervals. Repeat the shape in different sizes, tilting some left and others right for a playful rhythm. Arranged in a row along the top of the window, they form a cheerful border that instantly says it is Christmas. Simple, bold, and eye-catching.
Painter’s tape is your best friend here. Place thin strips of tape at an angle to guide perfectly spaced stripes, then peel them away once the paint dries. Outline each candy cane with a soft pink or gray line so the white remains visible against bright daylight. You can also add small green bows or holly leaves at the hook for extra festive detail and a more polished, boutique-inspired appearance.
9. Winter Village Skyline

A winter village skyline turns your window into a cozy miniature world. Paint a row of small houses with pointed roofs along the bottom edge, using black or deep blue for a silhouette effect. Add glowing yellow squares for lit windows, plus a church steeple and a few snow-covered pine trees. When sunlight passes through the glass, the scene looks like a peaceful evening in a snowy mountain town. Simple shapes, beautiful result.
Keep the houses geometric and simple, using rectangles topped with triangles. Vary their heights to create rhythm and depth. A few tiny chimneys with curling smoke add storytelling charm. For the sky, dab white dots or a gentle sponge pattern to suggest falling snow. At night, a small lamp placed behind the glass makes the yellow windows glow softly, creating a warm, magical scene that neighbors and passersby will enjoy admiring.
10. Holly and Berry Garland
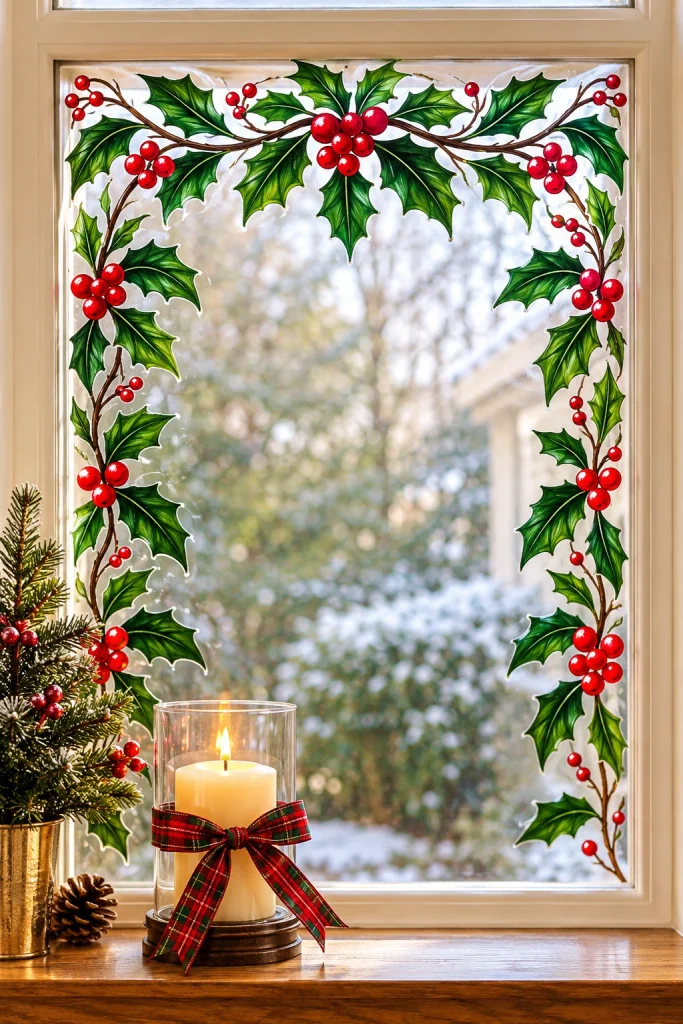
Holly leaves and red berries bring natural elegance to Christmas windows. Paint a curved garland across the top or along the sides using dark green leaves with pointed edges. Cluster three round red berries at the base of each leaf group. Add thin brown stems to connect everything. The look is traditional, refined, and timeless, and it pairs beautifully with real wreaths, ribbons, and warm candlelight displayed on the windowsill below.
Create realistic leaves by painting a simple almond shape, then adding a lighter center line with a thin marker. Alternate leaf directions to make the garland look natural and full. A tiny white highlight on each berry gives it a glossy, three-dimensional effect. If you want a luxurious variation, outline the leaves in gold instead of filling them in. This design works wonderfully on tall, narrow windows and small cottage-style panes.
11. Penguins in the Snow
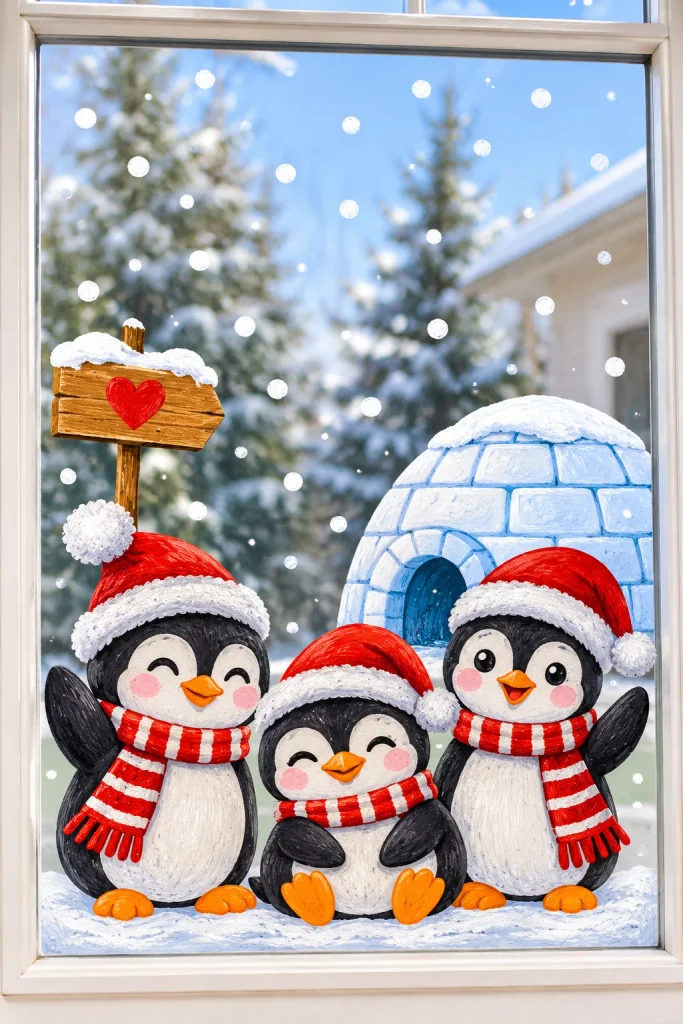
Penguins are adorable, easy to draw, and surprisingly festive when dressed for Christmas. Paint an oval black body with a white belly, an orange beak, and little orange feet. Then add a red Santa hat or a striped scarf to each one. Group two or three together at the bottom of the window, and they instantly look like a cheerful winter party enjoying the snowy scene. Kids and adults will both smile.
Black paint looks bold on glass, so use it sparingly to keep the design light and friendly. Draw simple shapes first, then fill them in once you are happy with the layout. Tiny blush circles on the cheeks add personality, while a few white dots around them suggest falling snowflakes. You can also add a small igloo or ice blocks beside the penguins to build a fun arctic scene with very little effort.
12. “Merry Christmas” Script Lettering
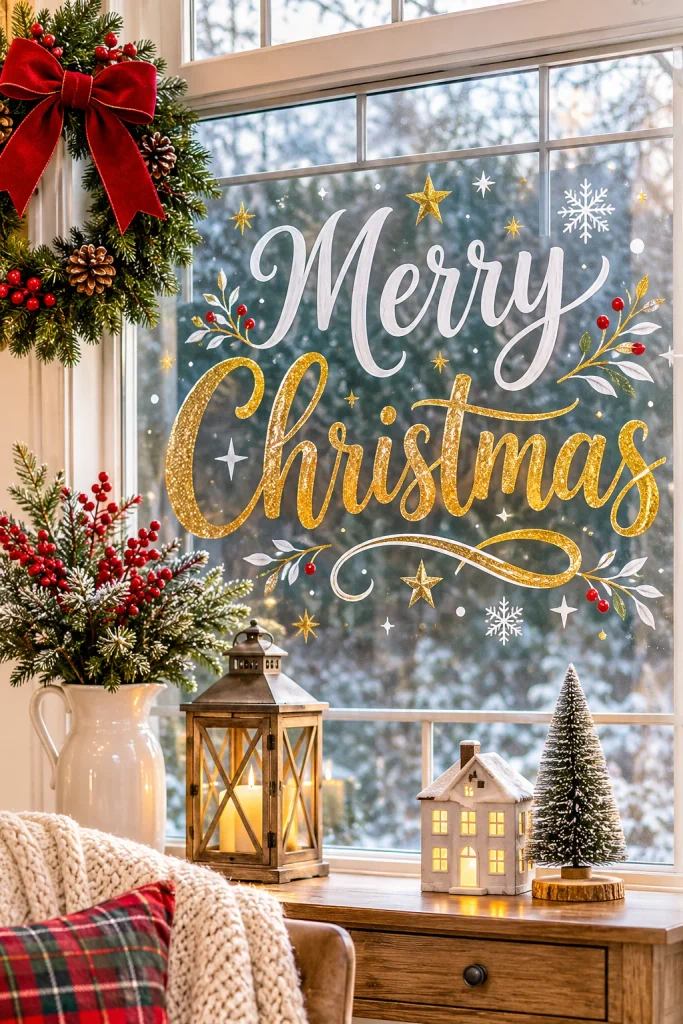
Sometimes the simplest design is the most beautiful. Write the words Merry Christmas across your window in flowing script lettering using white or gold paint. Add small flourishes, like curls at the end of letters, tiny stars, or a delicate swirl underneath. The message welcomes guests warmly, and the elegant style fits perfectly in farmhouse, modern, and traditional homes that prefer subtle, refined holiday decorations over busy designs. It looks professionally done.
If handwriting feels intimidating, print your favorite font, tape it behind the glass, and trace over it carefully with a paint marker. Practice the strokes on paper first to build confidence. Keep the lettering centered and leave breathing space around the words. Thicker downstrokes and thinner upstrokes create a classic calligraphy look. You can also choose a fun, bouncy font for a playful style that matches a children’s room or a cheerful café.
13. Santa’s Sleigh Silhouette

A flying sleigh silhouette adds movement and wonder to your window. Paint a simple sleigh shape in black or deep red, then add reindeer leaping ahead in a graceful arc. Include a tiny Santa figure holding the reins and a sack of gifts behind him. Place the scene across the top of the window, where it appears to soar through the night sky above your home. Children will adore the magical effect.
Silhouettes are easier than detailed characters because you only need to focus on shape. Sketch the outline with a washable pencil or marker, then fill it in with solid paint. Add a trail of gold stars or dots behind the sleigh to suggest speed and sparkle. Pair the design with a crescent moon and a few scattered stars for a complete, enchanting scene that feels like Christmas Eve. It is simple yet impressive.
14. Nativity Scene
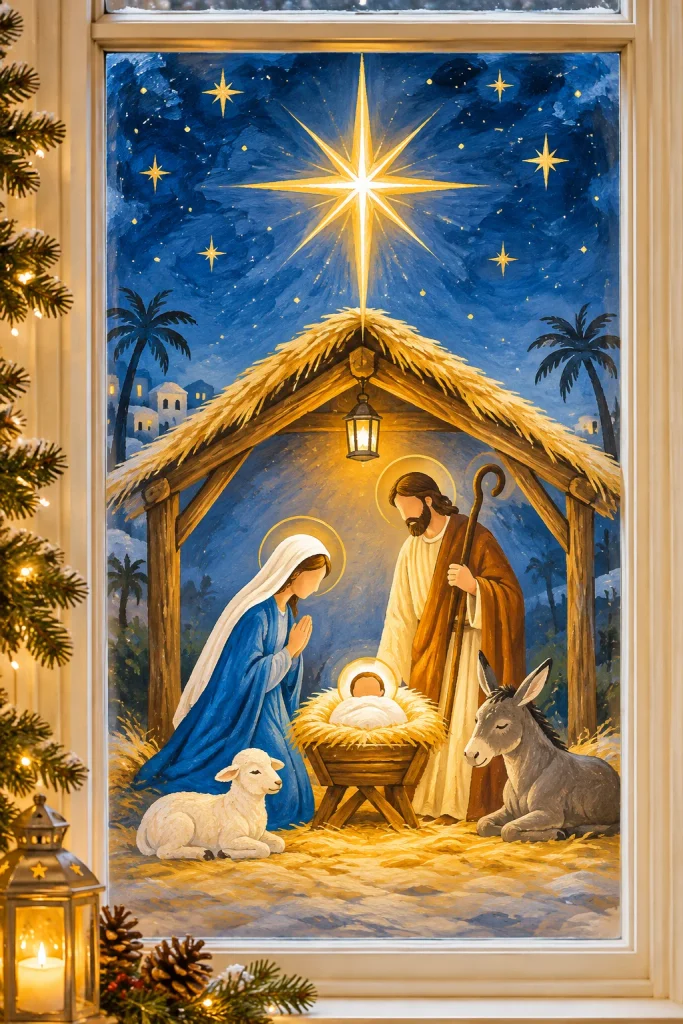
A painted nativity scene honors the heart of the Christmas story with quiet beauty. Start with a simple stable shape, then add Mary, Joseph, and the baby in the manger using soft, rounded figures. Place a bright star above the roof to guide the way. Using calm colors like blue, cream, and gold gives the window a peaceful, reverent feeling that is perfect for families and church displays. It feels deeply meaningful.
Keep the figures minimal by using simple faceless shapes, which look modern and are easier to paint. Add a few animals like a lamb or donkey for warmth. A gentle yellow glow around the manger can be created by dabbing diluted paint with a sponge. Frame the scene with small stars or olive branches. This design brings a sense of calm and meaning to any home during the busy holiday season.
15. Sponged Frosty Snow Effect

For a dreamy frosted look, skip detailed drawing and use a sponge instead. Dip a small makeup sponge into white window paint, blot off the excess, and gently dab along the bottom and corners of the glass. The soft, uneven texture looks like real frost clinging to the pane. This beginner-friendly technique takes only minutes and creates a wintry atmosphere that feels natural, delicate, and effortlessly beautiful. Anyone can master it.
Layer the sponge marks in different densities for a realistic gradient, heavier near the edges and lighter toward the center. Add a few hand-painted snowflakes or a short winter greeting over the frosted background for contrast. Stencils work well too, because you can dab paint through the cutout to create crisp patterns like stars, trees, or reindeer. Clean-up is simple, and the finished window looks like it was professionally frosted.
16. Festive Wreath
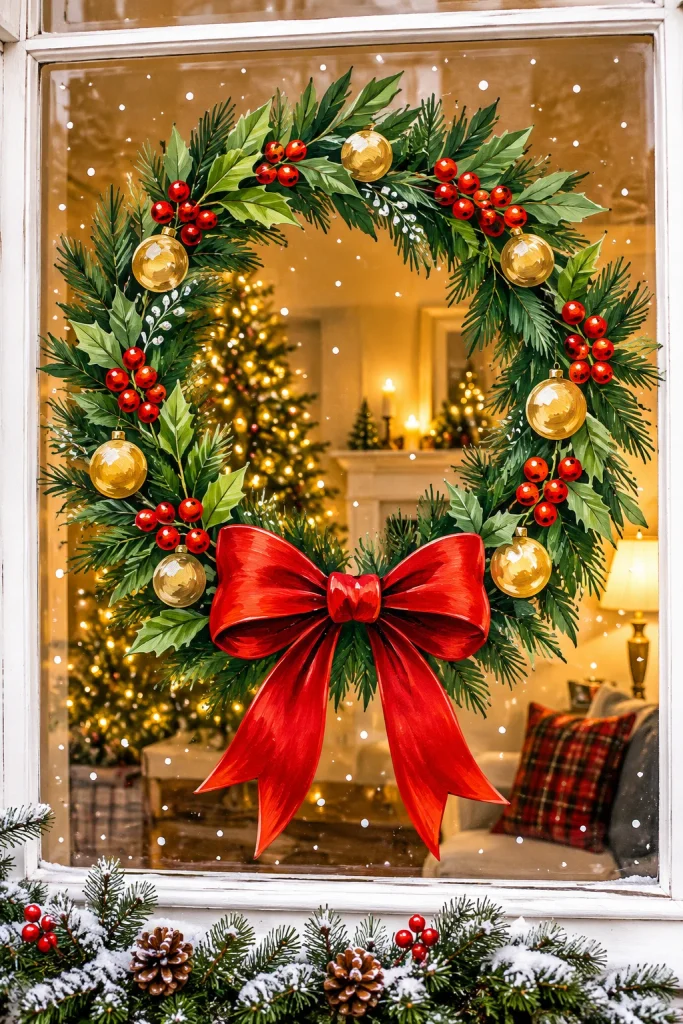
A painted wreath makes a lovely focal point, especially on windows facing the street. Draw a large circle with a thin marker, then fill the ring with overlapping green leaves, pine needles, or small sprigs. Add red berries, golden ornaments, and a big bow at the bottom. Because it saves you from hanging a real wreath, this design keeps your glass beautiful without adding weight, hooks, or mess. It looks lovely day and night.
To keep the circle even, trace a large plate or round tray lightly onto the glass. Paint the leaves in two shades of green for depth, with lighter strokes on top. Choose a ribbon color that matches your home, such as classic red, soft blush, or deep navy. Add tiny white dots across the wreath to represent snow, and your window will look cozy, elegant, and festive. Everyone will notice it from the sidewalk.
17. Polar Bear and Northern Lights
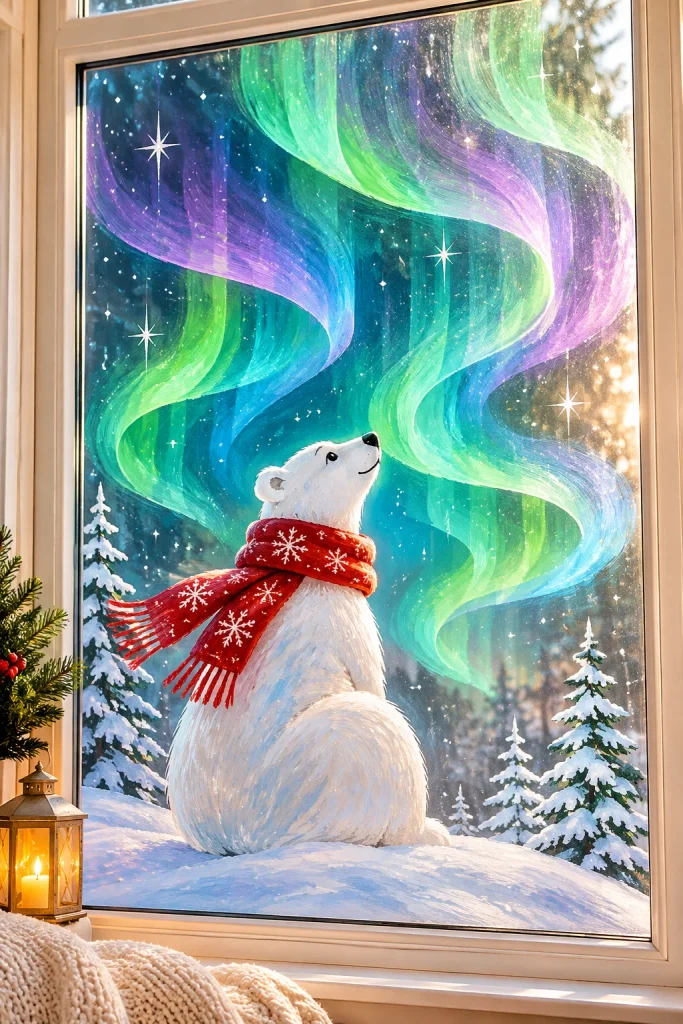
A polar bear beneath glowing northern lights creates a gorgeous, unexpected holiday scene. Paint a soft white bear sitting on a snowy hill, then add flowing ribbons of green, purple, and blue across the sky. Use light, translucent strokes so the colors blend like real auroras. A few stars and a small red scarf on the bear add festive personality and a touch of Christmas warmth. It looks truly magical in sunlight.
Glass is the perfect canvas for aurora effects, because light passes through the paint and makes colors glow. Dilute your paint with a drop of water and brush it in sweeping curves, letting the shades overlap naturally. Outline the bear with a thin gray marker to keep its shape clear. This idea suits larger windows and creates an artistic, modern look that stands out from traditional holiday designs. Truly a showstopper.
18. Gift Boxes With Bows

Painted presents bring joyful anticipation to your window. Draw squares and rectangles in different sizes, then decorate each with ribbon lines and a bow on top. Use classic red and green, or try gold, silver, and white for a luxurious look. Stack the boxes at the bottom of the window as though they are waiting beneath a tree, and your glass becomes a festive display. It is quick, colorful, and fun.
Vary the patterns to make each gift unique, using stripes, polka dots, zigzags, and tiny stars. Bows are easy to paint by drawing two loops and a small knot in the center. Add small gift tags with handwritten names for a personal touch. This design is wonderful for children’s rooms, classrooms, and shop windows, because it feels playful, cheerful, and full of the excitement that makes the holiday season so special.
19. Hot Cocoa Mugs

Nothing says winter comfort like a steaming mug of hot cocoa. Paint a chunky mug in red or white, then top it with fluffy whipped cream and tiny marshmallows. Add curly lines above the cup to represent rising steam, and a candy cane for stirring. Place a few mugs in a row on the lower part of your window for a charming, cozy, and delicious-looking display. It instantly warms the room.
Give each mug its own personality with different patterns, such as snowflakes, hearts, stripes, or reindeer. Use brown paint for the cocoa and a lighter shade to show creamy highlights. Add small hearts or stars in the steam for extra whimsy. This idea is wonderful for kitchen windows, café storefronts, and breakfast nooks, where it blends naturally with seasonal treats and welcomes everyone with a friendly, comforting holiday message. Sweet and simple.
20. Advent Countdown Window
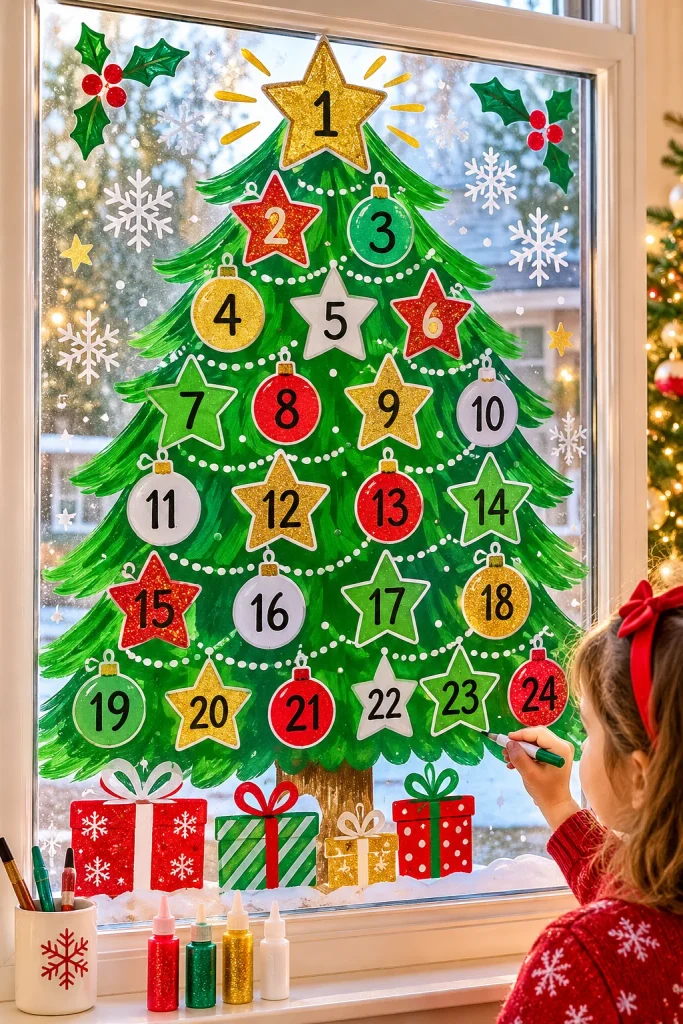
Turn your window into a fun advent calendar that builds excitement all month long. Paint twenty-four small shapes, such as stars, ornaments, or mini trees, and number each one with a paint marker. Each day, color in or decorate one shape to count down to Christmas. Children love the daily ritual, and it gives the whole family a creative tradition to enjoy together. Anyone walking past will enjoy following the progress too.
Arrange the shapes in a large tree outline, a big wreath, or a simple grid for a neat, organized look. Use a different color for each completed day, or add glitter paint for sparkle on special dates. Wipe away the numbers after Christmas with a damp cloth. This interactive idea combines art, anticipation, and family fun, making your window the most meaningful and memorable decoration of the entire holiday season.
Final Thoughts
Christmas window painting is about more than paint and glass. It is about turning an ordinary pane into a glowing story of snowflakes, stars, and festive joy that welcomes everyone who passes by. Whether you choose a classic Santa, a cozy gingerbread house, or an elegant gold script, every easy DIY idea here can be adapted to your style, your skill level, and your budget. Grab your brushes, invite the family, and let your windows sparkle this season.